


The correct cleaning of dental instruments and equipment is essential for the success of the entire sterilization process. It is important to remember that an instrument that is not properly cleaned, even if sterilized, can be a vehicle for cross-contamination, because the organic material on the instrument inhibits the action of the sterilizing agent.
Before the widespread use of ultrasonic tanks and thermodisinfectors, and thus mechanical washing of instruments, staff had to clean their instruments by hand, requiring a great deal of time and energy and with high risks for the operator. Today, mechanical washing is an important step forward in sterilisation practices, as it limits the risk of cross-contamination and percutaneous injuries, protecting workers from serious accidents and complications. Cutting and piercing injuries present the greatest danger to operators, which is why it is always necessary to ensure the use of safety products and to limit the handling of surgical instruments to a minimum.
8 things to do with your ultrasonic cleaner
There are at least eight good practices, which every practice should follow, to ensure the proper cleaning of instruments:
1. Use water at the right temperature
This is very important for two excellent reasons: on the one hand, the use of water above 40°C causes the blood to coagulate, making it more difficult to remove; on the other hand, using water that is too hot can cause denaturation of the enzymatic detergent or an increase in the bacterial load instead of its removal. It is therefore not recommended to place instruments soiled with blood in an ultrasonic tank with a water temperature above 40°C.
2. Pay attention to the detergent used and its dilution
With regard to the choice of detergent, it is always a good idea to avoid using peracetic acid because it can burst with cavitation and because the fumes can be dangerous for the operator. In any case, it is always a good idea to scrupulously follow the manufacturer’s instructions for use (IFU) of the ultrasound equipment and detergent. If the detergent is not properly diluted, there is a risk of damage to the instruments, inadequate cleaning and less-than-optimal decontamination, thus increasing the possibility of cross-contamination in the event of accidental percutaneous injuries during drying or packaging.
3. Change the solution every day
Sometimes it may be necessary to do this several times in the same day, but it must be done at least once a day. If you open the lid of the ultrasonic tank and the water is cloudy or you cannot even see the bottom of the tank, it is time to change it. The instruments inserted are often covered with blood or other residues that are unlikely to come out clean if immersed in water that is not clear. Our advice is therefore to monitor the water during the day and change it as needed.
4. Test the ultrasonic tank
It is not enough to simply assume that the ultrasonic tank is working; it must be tested regularly. It is a good idea to perform a daily Soil test, i.e. a test to check the cleaning capacity of the ultrasonic tank. The test substance simulates human blood and the tissue debris that can settle on instruments. The efficacy of the ultrasonic tank can be confirmed if the test substance previously applied to the instruments is removed once the cleaning cycle is complete.
5. Run an empty cycle before use
It is essential to know that the ultrasonic bath must be performed at least once without instruments, following the recommendations provided in the manufacturer’s user manuals. This phase is called degassing and its purpose is to optimise the cavitation and cleaning process by eliminating small air particles in the washing solution. It is an essential step for good propagation of sound waves in the washing liquid. It is important to carry out degassing every time liquids are changed, running the device with the solution only for about 10 to 15 minutes.
6. Work safely
When performing washing operations, cleaning the unit and changing the cleaning solution, appropriate Personal Protective Equipment should be worn, including goggles and a pair of nitrile gloves. It is also important that the operator always uses the lid to protect them from aerosols and splashes. This protects both the device and the surrounding environment from the spread of fumes, vapours and excessive noise: the lid is sound-absorbent, because it is made of a special plastic that dampens the noise produced by ultrasonic waves.
7. Do not place the instruments on the bottom of the tank
Always place them directly (in the baskets) or indirectly (inside the beakers). There are two methods of ultrasonic cleaning:
- Direct: the advantage is that it is simple and enables effective cleaning. The cleaning solution is poured into the tank (only one solution can be used at a time) and the instruments are placed in the perforated basket or suspended. Dirt will settle on the bottom of the tank.
- Indirect: This method is particularly suitable for washing small instruments such as burs or prostheses. The tank is filled with water and a cleaning solution to improve cavitation. Using the dedicated beaker holder, different cleaning solutions can be introduced into the beakers, so that even instruments of different types can be ultrasonically washed, choosing the solution according to the type of residue to be removed. The dirt will remain in the beaker.
8. Pay attention to the type of instruments to be inserted
To improve the efficacy of the device, it is important not to insert too many instruments and to ensure that they are always fully submerged. Instruments containing silicones or plastics, and especially those soiled with these substances, should not be placed in the tank, as these materials absorb vibrations and prevent proper cleaning of the other instruments. Specifically, the following should not be submerged: mouth mirrors, motors, mechanical components, diamond burs, fibre optic instruments and rubber bands.
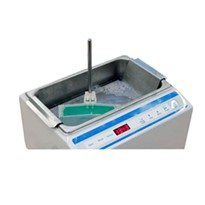
Ultrasonic washing: a key step in the sterilisation process
The ultrasonic bath is a useful cleaning tool in the dental field. Various residues accumulate on dental instruments both inorganic or organic (bioburden) and the removal of these impurities prior to sterilization is mandatory, as dirt residues can render the sterilization process ineffective. When a large amount of bioburden is present, the force of the steam may not be sufficient to reach the innermost part of the bioburden, resulting in incomplete sterilisation. Cleaning is therefore undoubtedly a key part of the sterilisation process, so it is necessary to devote close attention to it and to ensure adequate PPE is worn.
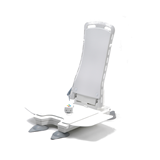
Ultrawave sterilisers from ICONA have a 3 year warranty and are available in 4.5, 9 and 13 litre models
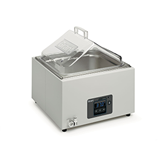
If your preference is for a washer disinfector, then why not have a look at the Eurosafe 60 by Euronda. Every Eurosafe 60 is supplied with a starter pack which allows you to start using the washer disinfector as soon as it is installed.


-205x205.jpg)