

Cleaning instruments in Healthcare practices
In 1860, Joseph Lister introduced fundamental improvements in the cleaning of healthcare instruments in order to prevent the spread of infection, and these techniques have evolved considerably since then.
A variety of residues accumulate on instruments. These may be inorganic residues, such as cement, composite or ions present in the water, or organic residues (also called bioburden) from the patient’s own tissue, blood or saliva. The removal of such impurities prior to sterilisation is mandatory, as residual dirt can render the sterilisation process ineffective. When a large amount of bioburden is present, the force of the steam may not be sufficient to reach the innermost part of the bioburden, resulting in incomplete sterilisation.
Cleaning is undoubtedly a key part of the sterilisation process, so it is necessary to devote close attention to it.
Before cleaning: removal and decontamination
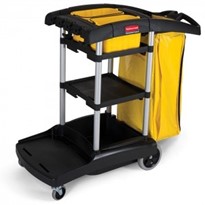
The first step in the cleaning process is to take the instruments to the sterilisation room, placing them in closed containers to avoid accidents. This procedure should be carried out as safely as possible, always wearing the appropriate personal protective equipment.
The use of closed containers or crates has several advantages: it allows the process to be carried out in a single step, protecting the instruments and facilitating organisation, storage and inventory, with a single package.
If you do not want to clean the instruments immediately, it is advisable to soak them in an enzymatic detergent to prevent the dirt from drying out, which would make subsequent cleaning more difficult. The liquid for soaking them in must be lukewarm; if it is too hot, the proteins in the organic matter may coagulate, making cleaning more difficult.
There are two ways to carry out the instrument cleaning process:
- Manual
- Mechanical, using ultrasonic tanks or thermodisinfectors
Manual cleaning
This should be avoided where possible, because it is unsafe for staff, time-consuming, relies on the individual performing it, and it is not possible to confirm the outcome with certainty, let alone standardise it. It should be reserved for instruments that cannot be cleaned using ultrasound or thermodisinfectors.
Most accidental injuries caused by instruments do not occur during work with patients, but in the course of handling the instruments. Insufficient concentration, in addition to high workload, as well as aerosol contamination, make this procedure a constant source of accidents.
Another disadvantage is the cost in labour time for the staff, as well as the environmental cost, because water consumption is higher.
Manual cleaning should be carried out by keeping the instruments under water to avoid splashing. The instruments (where this is stated by the manufacturer) must always be opened and disassembled for cleaning with a special brush. Sharp instruments must be cleaned separately to avoid accidents. All the instruments must be meticulously cleaned and rinsed thoroughly, first with running water and then with distilled water (this will prevent salts from settling on the instruments, thus preventing deterioration in the long term).
After inspecting each instrument to ensure that no residual organic matter remains, the drying phase can be carried out.
Drying is a very important step and consists of removing residual moisture from the instruments to prevent mineral salts from settling and hindering the sterilisation process. The autoclaves are programmed for the evaporation of the same amount of water introduced into the chamber, so too much water on the instruments would cause moisture or stains on the bags, and the process would then have to be repeated. According to sections 8 and 20 of UNE-EN ISO 285, the weight of the packaging after sterilization must not exceed 1% of the initial weight.
Once the drying process is complete, the instruments that need it can be maintained and lubricated to prevent corrosion and deterioration.
Mechanical cleaning
Safer, more thorough cleaning requires the use of automated procedures.
Mechanical cleaning has many advantages:
- Lower risk of accidental injury
- Lower risk of environmental contamination from aerosols and splashes
- Repeatability and traceability
- Saves time for staff
- Saves water
- More efficient cleaning
- Increased productivity
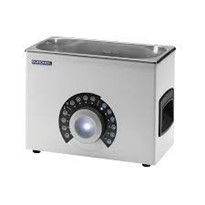
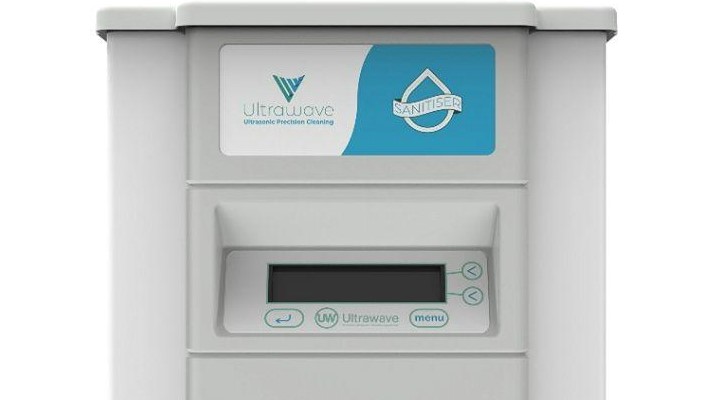
The ultrasonic tank is the most popular automatic cleaning mode in the dental sector. The short time between patients does not allow for 100% effective manual cleaning. In addition, there are many nooks and crannies that are completely inaccessible to brushes. Ultrasound has the advantage of acting on the entire surface of the instrument, providing one of the most effective cleaning methods available.
This technology is based on the production of ultrasound, propagated in the form of waves in the liquid in the tank. These waves cause a change in pressure, which in turn produces microbubbles (cavitation), which implode and generate energy able to remove dirt from the instruments.
There are numerous scientific studies analysing the cleaning of endodontic files (remember these are instruments that remove a large amount of residues and dental and pulp tissue from the patient). Ultrasonic cleaning and thermodisinfection are by far the most effective methods in terms of quality.
Recommendations:
- Add the liquid according to the dosage and at the temperature indicated by the manufacturer.
- To improve the efficiency of the device, it is important not to insert too many instruments and to ensure that they are always fully submerged.
- Place the instruments directly in the basket (never in direct contact with the tank) or indirectly, by inserting them into the dedicated glass containers.
- Instruments containing silicones or plastics, and especially those soiled with these substances, should not be placed in the tank, as these materials absorb vibrations and prevent proper cleaning of the other instruments: fibreglass instruments, rotating instruments and diamond burs may also be damaged.
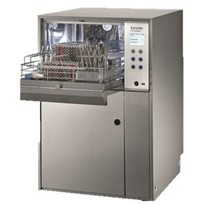
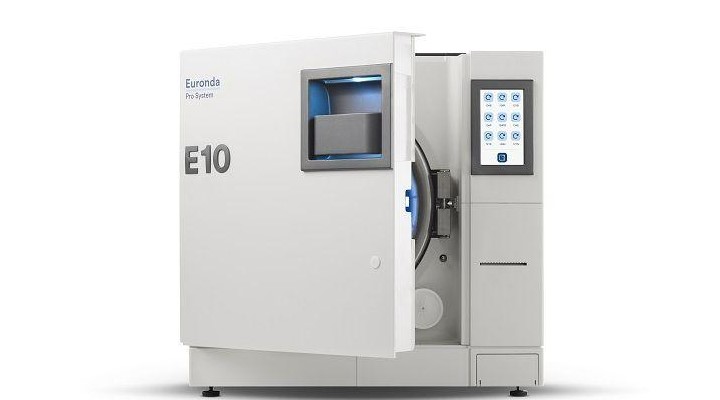
Thermal disinfection
Many authors agree that thermal disinfection should be the priority cleaning method.
Reduced instrument handling makes it the safest and most efficient cleaning method, as it avoids accidents and aerosol contamination, while saving staff many hours of work. It is a standardised, repeatable and traceable method.
Thermal disinfection is regulated by ISO 15883. It is an even process at all stages, so all the parameters (time, concentration, temperature) can be controlled. The duration of these programmes is based on the theory published in 1959 by Henkel engineer Herbert Sinner, author of the famous Sinner’s circle, based on the action of four forces which, when combined in a circular pattern, enable effective cleaning of materials. These forces are temperature, application time, mechanical action and chemical action. All these factors are present in the solvent, which in our case is water. The circle is not static. For example, if we use less time, we will have to compensate by increasing some of the other parameters, such as concentration; if the product has a higher temperature, the time of action of the disinfectant will be shorter.
After use, the instruments must be treated mechanically and/or manually and then be placed in the thermodisinfector. If they do not have to be cleaned immediately, they can be soaked; however, the use of foaming agents should be avoided (or they should be rinsed very well afterwards) to ensure effective thermal disinfection, because excess foam reduces the rinsing pressure, resulting in a less effective cleaning result.
The loading of the thermodisinfector is not a 100% automatic process and must be carried out by a qualified operator. First of all, the instruments must be dismantled and opened, and the nozzles must be positioned in such a way that their outlet is not obstructed, avoiding overlapping. It is therefore important not to overload the device.
Thermal disinfection is adjusted based on the A0 value (EN ISO 15883-1, Supplement A). This value expresses a temperature-time relationship based on the bacterial load. The higher the temperature, the less time is needed. A value of A0 3000 is required for cleaning dental instruments.
Thermal disinfection stages
Thermodisinfectors carry out cleaning in several stages, which can be customised and modified. Different programs can be set according to the type of instrument to be cleaned.
Pre-wash: with cold water to remove organic residues. To remove organic substances, carry out the pre-wash at a temperature of less than 40°C.
Cleaning: Usually carried out at a temperature of between 40°C and 65°C, with a detergent suitable for the type of water. If the water is rich in chlorides and therefore has a higher corrosion index, acidity should be neutralised by using alkalisers or deionised water.
Rinsing: with desalinated water, at a temperature of between 80°C and 90°C; duration should vary according to the A0 value.
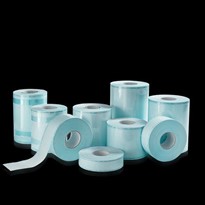
Drying: when extracted, the material should be perfectly dry and ready for packaging and sealing.
Recommendations:
- The use of perforated baskets boosts performance: at the end of each treatment, simply close the basket and insert it into the device.
- If the instruments do not have to be cleaned immediately, they can be soaked; however, the use of foaming agents should be avoided (or they should be rinsed very well afterwards) to ensure effective thermal disinfection, because excess foam reduces the rinsing pressure, resulting in a less effective cleaning result.
- For cleaning specific objects such as rotors or aspirators, the appropriate accessories (dedicated injectors) must be used.
- Once the cleaning process has been completed, it is important not to leave the material inside for too long (avoid leaving it overnight, for example), as this could facilitate the corrosion process. If you do not have time to bag immediately, the thermodisinfector door should be left open to prevent moisture accumulation.
- When positioning the material, it is important to avoid any overlapping, as the cleaning action takes place through the action of the jets.
- If the material to be cleaned is very dirty, it is advisable to use intensive cleaning programmes.
- When cleaning baskets containing small instruments, such as those used in implantology or endodontics, it is advisable to remove all burs or files from the box and place them in a perforated container, cleaning the container separately. This allows for more thorough cleaning of the files and burs.
Cleaning of rotary instruments
Suction and direct contact with patient fluids cause contamination of the washing arms, on which residues of tissue, blood, saliva and patient microorganisms can settle.
Rotors fall under the Spaulding classification as critical material, so they must be subjected to a thorough cleaning, conditioning and sterilisation treatment.
A controversy has arisen concerning the lubrication of the instruments. Manufacturers recommend lubrication prior to sterilization; however, lubricants protect against the effects of sterilisation, allowing the spores of the microorganisms to remain viable. This is why many manufacturers have introduced disinfectants into the composition of their products.
Before lubricating, it is important to thoroughly disinfect the instruments, if possible also on the inside. There are devices used specifically for the maintenance of rotary instruments. They carry out pressure lubrication that eliminates microorganisms, and even cleans the inside of the instruments. A possible alternative is to use the nozzles of the thermodisinfector for internal cleaning, followed by lubrication and sterilisation.
Conclusions
Proper sterilisation requires thorough cleaning of the instruments. Remember that dirty instruments do not allow for a proper sterilisation process. There are several procedures available, which can be chosen depending on our needs and those of our instruments. Automation of the different stages makes this process more productive, increasing its safety, efficiency and reproducibility. In addition, the use of the thermodisinfector allows for the traceability of all the steps in the sterilisation of each instrument (washing, bagging and sterilisation). Thanks to these procedures, each instrument can be traced correctly.
Bibliography
- Offner D, Brisset L, Musset AM. Evaluation of the mechanical cleaning efficacy of dental handpieces. J Hosp Infect. 2019 Sep;103(1):e73-e80. doi: 10.1016/j.jhin.2018.11.011. Epub 2018 Nov 27. PMID: 30500388.
- U.S. Department of Labor, Occupational Safety and Health Administration. 29 CFR part 1910.1030, Occupational exposure to bloodborne pathogens, final rules. Federal Register 1991,56(235)64004-64182
- KELSCH, N. B. Team-Centred Approach to Instrument Processing and Infection Control. RDH, [s. l.], v. 36, n. 12, p. 39–50, 2016.
- Kohn WG, Collins AS, Cleveland JL, et al. Guidelines for infection control in dental health-care settings — 2003. MMWR Recomm Rep. 2003;52(RR-17):1-61
- UNE-EN ISO 285 apartado 8 y 20.
- Cuny E.J. Cleaning Instruments: A Critical Step to Instrument Reprocessing. Inside Dental Assisting. Sep2010 Supplement, Vol. 6 Issue 8, p26-29. 4p.
- Johnson MA, Primack PD, Loushine RJ, Craft DW (1997) Cleaning of endodontic files, Part I: The effect of bioburden on the sterilization of endodontic files. Journal of Endodontics 23, 32–4.
- Nosouhian S, Bajoghli F, Sabouhi M, Barati M, Davoudi A, Sharifipour M (2015) Efficacy of different techniques for removing debris from endodontic files prior to sterilization. Journal of International Oral Health 7, 42–6.
- Van Eldik DA, Zilm PS, Rogers AH, Marin PD (2004) A SEM evaluation of debris removal from endodontic files after cleaning and steam sterilization procedures. Australian Dental Journal 49, 128–35.
- Head MW, Ritchie D, McLoughlin V, Ironside JW (2003) Investigation of PrPres in dental tissues in variant CJD. British Dental Journal 195, 339–43.
- World Health Organization (2010) Tables on tissue infectivity distribution in Transmissible Spongiform Encephalopathies. [WWW document]. URL: http://www.who.int/bloodproducts/tablestissueinfectivity.pdf [Accessed on 17 March 2017]
- Department of Health (DOH). (2013) Decontamination Health Technical Memorandum 01–05: Decontamination in primary care dental practices.
- Martin M, Fulford M, Preston T. (2009) Infection control for the dental team. New Malden: Quintessence Publishing.
- Pankhurst CL, Coulter WA. (2009) Basic Guide to Infection Prevention and Control in Dentistry (Basic Guide Dentistry Series). Oxford: Wiley-Blackwell.
- EN ISO 15883
- Checchi L, Montebugnoli L, Samaritani S. Contamination of the turbine air chamber: a risk of cross infection. J Clin Periodontol 1998; 8: 607–611
- Lewis D L, Arens M, Appleton S S et al.Cross-contamination potential with dental equipment. Lancet 1992; 340: 1252–1254.
- Edwardsson S, Svensatar G, Birkhed D. Steam sterilisation of air turbine dental handpieces. Acta Odontol Scand 1983; 41: 321–326
Article by Dr. Gema Maeso, specialist in preventive odontoloy. European Board in periodontics certified.