

Proper maintenance and care are essential to ensure the longevity and optimal performance of your ultrasound machine. Regular maintenance and adherence to specific care guidelines can help prevent equipment malfunctions, extend the lifespan of the machine, and maintain image quality. In this guide, we will discuss some important maintenance and care practices for ultrasound machines.
1. Follow the Manufacturer's Guidelines
Always refer to the manufacturer's guidelines and user manual for specific maintenance instructions. Each ultrasound machine may have unique requirements, and it's important to follow the recommended maintenance schedule provided by the manufacturer.
2. Transducer Care
The transducer is a critical component of an ultrasound machine. Handle it with care to prevent damage. Clean the transducer before and after each use following the manufacturer's instructions. Avoid using abrasive or harsh cleaning agents that can damage the transducer's surface. Inspect the transducer regularly for any signs of wear or damage and report any issues to the manufacturer or service provider.
3. Proper Cleaning
Maintaining a clean ultrasound machine is crucial for infection control and image quality. Clean the machine and accessories regularly using approved disinfectants and cleaning agents recommended by the manufacturer. Pay special attention to high-touch areas, such as control panels, knobs, and touchscreens. Follow proper cleaning techniques to avoid damage to the machine.
4. System Calibration and Updates
Periodically calibrate your ultrasound machine to ensure accurate and reliable measurements. Calibration should be performed by qualified technicians following the manufacturer's guidelines. Additionally, stay updated with software and firmware upgrades provided by the manufacturer. These updates may include bug fixes, improved features, and enhanced image processing algorithms.
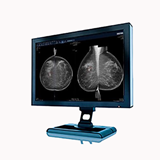
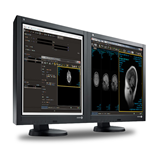
5. Monitor and Printer Maintenance
If your ultrasound machine has a built-in monitor and printer, maintain them regularly as well. Clean the monitor screen using a soft, lint-free cloth and avoid using harsh cleaning agents that can damage the screen. For printers, ensure that they have sufficient paper and ink or toner. Clean the printer heads periodically to prevent clogging and maintain print quality.
6. Environmental Considerations
Ensure that the ultrasound machine is stored and used in an appropriate environment. Protect the machine from extreme temperatures, humidity, and direct sunlight. Avoid placing it near sources of electromagnetic interference, such as other electronic devices or power cables. Maintain proper ventilation around the machine to prevent overheating.
7. Service and Maintenance Contracts
Consider investing in a service and maintenance contract offered by the manufacturer or a third-party provider. These contracts typically cover routine maintenance, calibration, and repairs. Regular servicing by qualified technicians can identify and address potential issues before they become major problems. Service contracts also provide access to technical support, ensuring prompt assistance in case of equipment malfunction.
8. Staff Training
Ensure that your staff receives proper training on the operation and maintenance of the ultrasound machine. Train them on the correct cleaning procedures, proper transducer handling, and basic troubleshooting. Educate them about potential risks and the importance of following maintenance guidelines. Well-trained staff can contribute to the overall care and longevity of the ultrasound machine.
How to Clean and Disinfect Your Ultrasound Machine
Proper cleaning and disinfection of your ultrasound machine are essential to maintain a sterile and safe environment for patients and healthcare providers. Regular cleaning helps prevent the spread of infections and ensures optimal performance of the equipment. In this guide, we will outline the steps to effectively clean and disinfect your ultrasound machine.
1. Preparation
Before starting the cleaning process, ensure that you have the necessary supplies, including:
- Disposable gloves
- Clean, lint-free cloths or disposable wipes
- The approved disinfectant solution recommended by the manufacturer
- Isopropyl alcohol (if applicable)
- Water or sterile saline solution (if applicable)
2. Power Off and Unplug
Turn off the ultrasound machine and unplug it from the power source. This step is crucial to prevent electrical hazards and damage to the equipment during the cleaning process.
3. Wear Gloves
Put on disposable gloves to protect yourself from any potential contact with contaminants during the cleaning process.
4. Clean the Transducer
Start by cleaning the transducer, which is the most frequently handled part of the ultrasound machine. Follow these steps:
-
If the transducer is removable, detach it from the machine according to the manufacturer's instructions.
-
Wipe the transducer gently with a clean, lint-free cloth or disposable wipe dampened with an approved disinfectant solution.
-
Pay special attention to the transducer's surface, including the lens and cable.
-
If there are visible stains or debris, use a soft brush or cotton swab dampened with the disinfectant solution to remove them.
-
Do not submerge the transducer in any liquid, as it may damage the internal components.
5. Clean the Machine Surfaces
Proceed to clean the external surfaces of the ultrasound machine:
-
Dampen a clean, lint-free cloth or disposable wipe with the approved disinfectant solution.
-
Wipe the control panel, keyboard, touch screen (if applicable), and other surfaces of the machine.
-
Pay attention to areas that are frequently touched, such as knobs, switches, and buttons.
-
Ensure that the cloth or wipe is not dripping wet to avoid liquid entering the machine.
-
If there are stubborn stains, gently scrub them with a soft brush or cotton swab dampened with the disinfectant solution.
6. Disinfect the Transducer
After cleaning, it is important to disinfect the transducer to eliminate any potential pathogens. Follow these steps:
-
Apply the approved disinfectant solution directly to a clean, lint-free cloth or disposable wipe.
-
Thoroughly wipe the entire surface of the transducer, ensuring complete coverage.
-
Allow the disinfectant to remain on the transducer for the recommended contact time specified by the manufacturer.
-
If necessary, repeat the process to ensure effective disinfection.
7. Allow Sufficient Drying Time
After cleaning and disinfection, allow all surfaces, including the transducer, to air dry completely. Avoid using compressed air or heat sources to expedite the drying process, as they may damage the equipment.
8. Documentation
Maintain proper documentation of the cleaning and disinfection process, including the date, time, and steps performed. This documentation can serve as evidence of compliance with infection control protocols and regulatory requirements.
Additional Tips:
-
Refer to the manufacturer's guidelines for specific cleaning and disinfection instructions tailored to your ultrasound machine model.
-
If the transducer has a removable sheath or cover, dispose of it after each use and follow proper disposal protocols.
-
If the transducer requires sterilization, consult the manufacturer's instructions for appropriate methods and equipment.
-
Regularly inspect the transducer and cables for any signs of damage or issue
Troubleshooting Common Problems with Ultrasound Machines
Ultrasound machines are sophisticated medical devices that can encounter various technical issues from time to time. Understanding how to troubleshoot common problems can help you identify and resolve issues promptly, ensuring uninterrupted workflow and accurate diagnostic capabilities. In this guide, we will discuss some common problems that may arise with ultrasound machines and provide troubleshooting tips.
1. No Power or Failure to Turn On
If your ultrasound machine does not power on or fails to turn on, follow these steps:
-
Check the power source and ensure the machine is properly plugged in.
-
Verify that the power cord is not damaged or loose.
-
Test the electrical outlet by plugging in another device to determine if the problem lies with the outlet.
-
Ensure that the power switch on the machine is in the correct position.
-
If none of the above steps resolve the issue, consult the manufacturer's guidelines or contact technical support for further assistance.
2. Poor Image Quality
If you are experiencing poor image quality during ultrasound examinations, consider the following troubleshooting steps:
-
Clean the transducer and ensure it is free from debris or damage.
-
Verify that the transducer is properly connected to the machine.
-
Adjust the imaging settings such as gain, depth, focus, and frequency to optimize image quality.
-
Check the presets or default settings and make adjustments if necessary.
-
Ensure that the patient's skin is properly prepared with gel and positioned correctly.
-
If image quality issues persist, consult the manufacturer's guidelines or contact technical support for further assistance.
3. Overheating
Overheating can lead to performance issues and potential damage to the ultrasound machine. To troubleshoot overheating problems:
-
Ensure that the machine is placed in a well-ventilated area and not obstructed by objects that may block airflow.
-
Check if the cooling fans are functioning properly and not obstructed by dust or debris.
-
Verify that the machine's temperature sensors are not indicating excessive heat.
-
Allow the machine to cool down before attempting to use it again.
-
If overheating problems persist, consult the manufacturer's guidelines or contact technical support for further assistance.
4. Error Messages or System Freezing
If you encounter error messages or experience system freezing while operating the ultrasound machine, try the following troubleshooting steps:
-
Restart the machine and check if the error message persists.
-
Note down the error message or code and consult the user manual or manufacturer's documentation for possible solutions.
-
Ensure that the machine's software is up to date. If necessary, install any available updates or patches provided by the manufacturer.
-
If the error message continues to appear or the system freezes frequently, consult the manufacturer's guidelines or contact technical support for further assistance.
5. Transducer Issues
Transducer-related problems can affect the image quality and overall performance of the ultrasound machine. Consider the following troubleshooting steps:
-
Inspect the transducer for any visible damage, such as cracks or loose cables.
-
Ensure that the transducer is securely connected to the machine.
-
Clean the transducer following the manufacturer's guidelines to remove any debris or residue that may impact its performance.
-
If the transducer continues to exhibit issues, consult the manufacturer's guidelines or contact technical support for further assistance.
6. Networking or Connectivity Problems
If you are experiencing networking or connectivity issues with your ultrasound machine, try the following troubleshooting steps:
-
Verify that all network cables are securely connected.
-
Check the network settings on the machine to ensure they are configured correctly.
-
Restart the machine and the network router or switch.
-
If using wireless connectivity, ensure that the machine is within range of the network and that the network credentials are entered correctly.
-
Consult the manufacturer's guidelines or contact technical support for further assistance if connectivity issues persist.
7. Abnormal Noise or Vibration
If your ultrasound machine is producing abnormal noise or experiencing excessive vibrations, follow these troubleshooting steps:
-
Check for any loose parts or components and tighten them if necessary.
-
Ensure that the machine is placed on a stable surface and not in contact with any objects that may cause vibrations.
-
Inspect the cooling fans to ensure they are functioning properly and not causing excessive noise.
-
If the noise or vibration persists or appears to be originating from internal components, consult the manufacturer's guidelines or contact technical support for further assistance.
8. Software or User Interface Issues
If you encounter software glitches or user interface problems, try the following troubleshooting steps:
-
Restart the machine and check if the issue persists.
-
Verify that the machine's software is up to date. Install any available updates or patches provided by the manufacturer.
-
Ensure that the machine's user interface settings are configured correctly.
-
If the issue continues or affects the functionality of the machine, consult the manufacturer's guidelines or contact technical support for further assistance.
9. System Error or Malfunction
In the event of a system error or malfunction that is not covered by the previous troubleshooting steps, consider the following actions:
-
Restart the machine to see if the error clears.
-
Consult the user manual or manufacturer's documentation for specific troubleshooting steps related to the error or malfunction.
-
Contact technical support or the manufacturer's customer service for further assistance in diagnosing and resolving the issue.
Service and Repair Options for Ultrasound Machines
Ensuring the proper functioning of your ultrasound machine is essential for delivering accurate diagnoses and maintaining the efficiency of your medical practice or clinic. Inevitably, there may come a time when your ultrasound machine requires service or repair. Understanding the available options for servicing and repairing ultrasound machines can help you make informed decisions and minimize downtime. Here are some service and repair options to consider:
1. Manufacturer Service
Most ultrasound machine manufacturers offer dedicated service and support for their products. Manufacturer service typically involves:
- Factory-trained technicians: Manufacturers have technicians who specialize in their specific ultrasound machines. They possess in-depth knowledge and expertise in diagnosing and repairing issues.
- Genuine parts: Manufacturer service ensures the use of genuine parts, which helps maintain the integrity and performance of your machine.
- Warranty coverage: If your ultrasound machine is still under warranty, manufacturer service may be the most cost-effective option, as it often covers repairs and replacements.
To avail of manufacturer service, contact the manufacturer directly or consult their website for authorized service centers or authorized third-party service providers.
2. Third-Party Service Providers
There are reputable third-party service providers that specialize in ultrasound machine repair and maintenance. These companies offer various advantages, including:
- Cost-effectiveness: Third-party service providers may offer competitive pricing for repairs and maintenance, particularly for older or out-of-warranty ultrasound machines.
- Flexibility: They often provide on-site repair services, minimizing the need to transport the machine to a service center.
- Customized service plans: Third-party service providers may offer tailored service plans based on your specific needs, such as preventive maintenance, regular inspections, or emergency repairs.
- Quick turnaround time: Some third-party service providers prioritize quick turnaround times to minimize downtime for your practice.
When choosing a third-party service provider, ensure they have a good reputation, experience with your ultrasound machine model, and access to genuine parts.
3. In-House Biomedical Engineering Department
Larger medical institutions or hospitals may have an in-house biomedical engineering department responsible for maintaining and repairing medical equipment, including ultrasound machines. The advantages of utilizing an in-house department include:
- Immediate support: With an in-house team, you can have quicker access to repair and maintenance services, as they are readily available within your facility.
- Familiarity with your environment: The in-house team is familiar with your practice's specific needs, workflows, and equipment, enabling them to provide efficient and tailored solutions.
However, maintaining an in-house biomedical engineering department requires significant investment in resources, training, and ongoing support. It may be more feasible for larger organizations or healthcare facilities.
4. Preventive Maintenance Contracts
Preventive maintenance contracts are offered by both manufacturers and third-party service providers. These contracts typically involve scheduled inspections, calibration, cleaning, and routine maintenance to prevent potential issues and ensure optimal performance. Key benefits of preventive maintenance contracts include:
- Regular service: Your ultrasound machine receives regular check-ups and maintenance to identify and address potential problems before they cause significant disruptions.
- Extended lifespan: Proper maintenance through preventive contracts can extend the lifespan of your machine, minimizing the need for major repairs or replacements.
- Priority service: With a contract in place, you may receive priority service in case of emergencies or breakdowns.
Consider the cost-effectiveness and specific coverage of preventive maintenance contracts, and choose a provider that suits your requirements.
In conclusion, proper maintenance, care, and timely repair are crucial for ultrasound machines to ensure their longevity and optimal performance. By following the manufacturer's guidelines, handling the transducer with care, practising proper cleaning and disinfection techniques, calibrating the system, and maintaining the monitor and printer, you can prevent malfunctions and maintain image quality. It is important to consider environmental factors, invest in service and maintenance contracts, provide staff training, and document cleaning and disinfection processes. When troubleshooting common problems, checking power sources, addressing image quality issues, preventing overheating, resolving error messages, and dealing with transducer or connectivity problems can help maintain uninterrupted workflow and accurate diagnostics. Lastly, considering manufacturer service, third-party service providers, in-house biomedical engineering departments, and preventive maintenance contracts provide options for service and repair, allowing you to make informed decisions and minimize downtime. By prioritizing maintenance, care, and swift resolution of issues, you can ensure the reliable performance of your ultrasound machine and enhance patient care in your medical practice or clinic.